How to Batch Edit Image and Video Prompts in Workflow 2.0
After Generate Keyframes, every clip has a frame prompt (the opening still) and a video prompt (MiniMax motion). You can edit one clip, or open the Batch editor and rewrite every prompt in one window.
Saving prompts does not generate images or video and does not spend Credits. Generate separately after the text looks right.
Edit one clip or every clip
One clip
- Keyframe: click a tile, then Edit Image for the frame prompt. The inspector Video Prompt is also editable.
- Video: click a clip on the timeline. Use the Image tab for the frame prompt and the Video tab for the video prompt.
Every clip
- Keyframe toolbar: Batch edit images
- Video toolbar: Batch edit videos
The window is the same Batch editor. Keyframe opens the Image tab. Video opens the Video tab. Switch tabs inside the window when you need both.
Click a clip on the board or timeline when you only want that shot. Use the Batch editor when the same wording should change across the song.
Open the batch editor
Generate Keyframes first. If prompts are missing, the editor says Generate keyframe prompts first.
The overlay lists every clip with its time range and current still. Unsaved rows show Unsaved. Confirming Save writes the selected keyframe run only.
Close the window, click the overlay, or choose Discard to throw away local edits. Save first if you want to keep them.
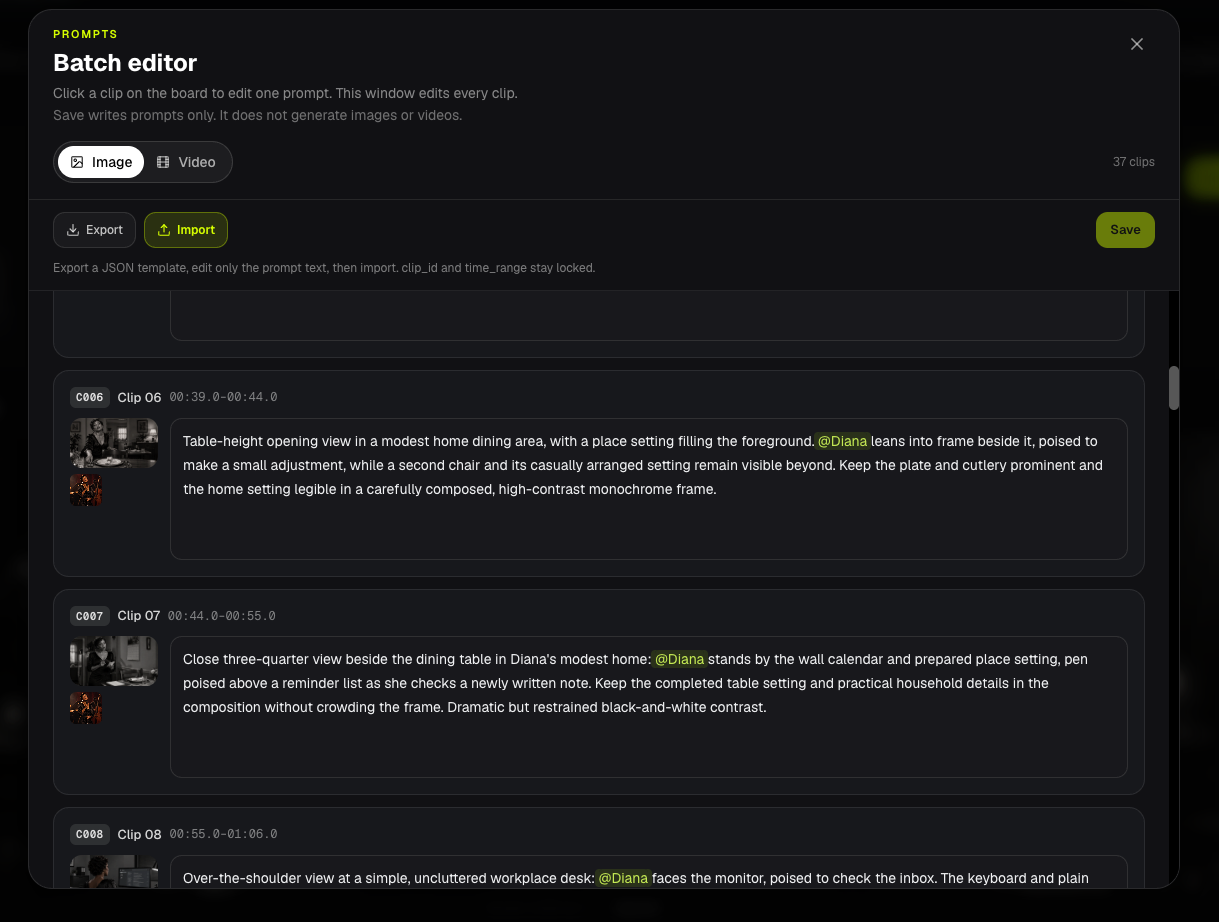
Save does not generate
Save / Save prompts updates prompt text on the current keyframe run. It does not call GPT Image, MiniMax, or the 6-credit prompt pack.
To see a new still, use Edit Image or generate that frame after saving. To see new motion, use Generate / Generate Videos.
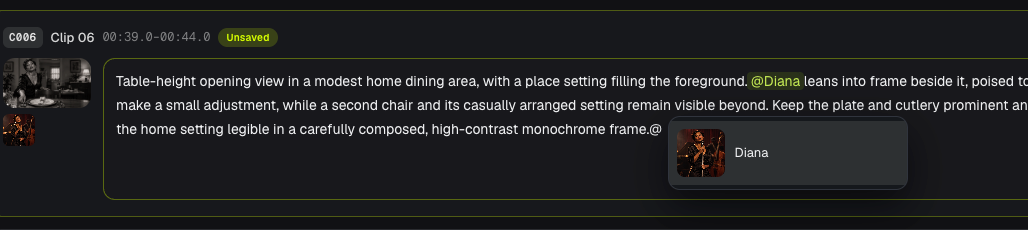
Mention characters with @
In a prompt field, type @ to pick a character who already has a reference photo on this clip.
The chip shows @Diana. BeatViz stores Diana (Image N) for the model.
Image N is not the order you typed @. It comes from this clip's storyboard @mentions, in Music Analysis character-list order.
- Image / frame prompt: Image 1 is the first tagged character photo.
- Video prompt: Image 1 is this clip's opening frame. Character photos start at Image 2.
Only characters tagged in that clip's storyboard description appear in the picker. Tag them on the storyboard, then Generate Keyframes again, if someone is missing.
Full @ rules for storyboard copy: Edit Cuts & Descriptions. Identity lock: Keep Characters Consistent.
Export and import a prompt file
Export downloads a UTF-8 .json template. Each clip keeps clip_id and time_range. Edit only the prompt strings.
Import writes prompt text onto matching clip_id rows. It cannot add clips, delete clips, or change timing.
The file must include every current clip_id. Extra IDs, missing IDs, empty prompts, or prompts over the length limit are rejected. Use a .json file under 512 KB.
Import fills the editor. Click Save to write the run. Import alone does not generate.
FAQs
Does Save spend Credits?
No. Save only stores prompt text.
Why is a character missing from the @ list?
That person is not @mentioned in this clip's storyboard description, or they have no reference photo. Fix the storyboard, then Generate Keyframes so the clip gets an Image N slot.
Can I import a file I edited in ChatGPT?
Yes, if you keep the exported clips array and every clip_id. Change prompt text only.
Continue learning: ← Previous: Generate Video Clips · Next: Lip Sync →
Related guides
Try BeatViz Workflow 2.0
Upload a song, choose Studio Create · 2.0, and move through Music Analysis, Storyboard, Keyframes, and MiniMax clips.