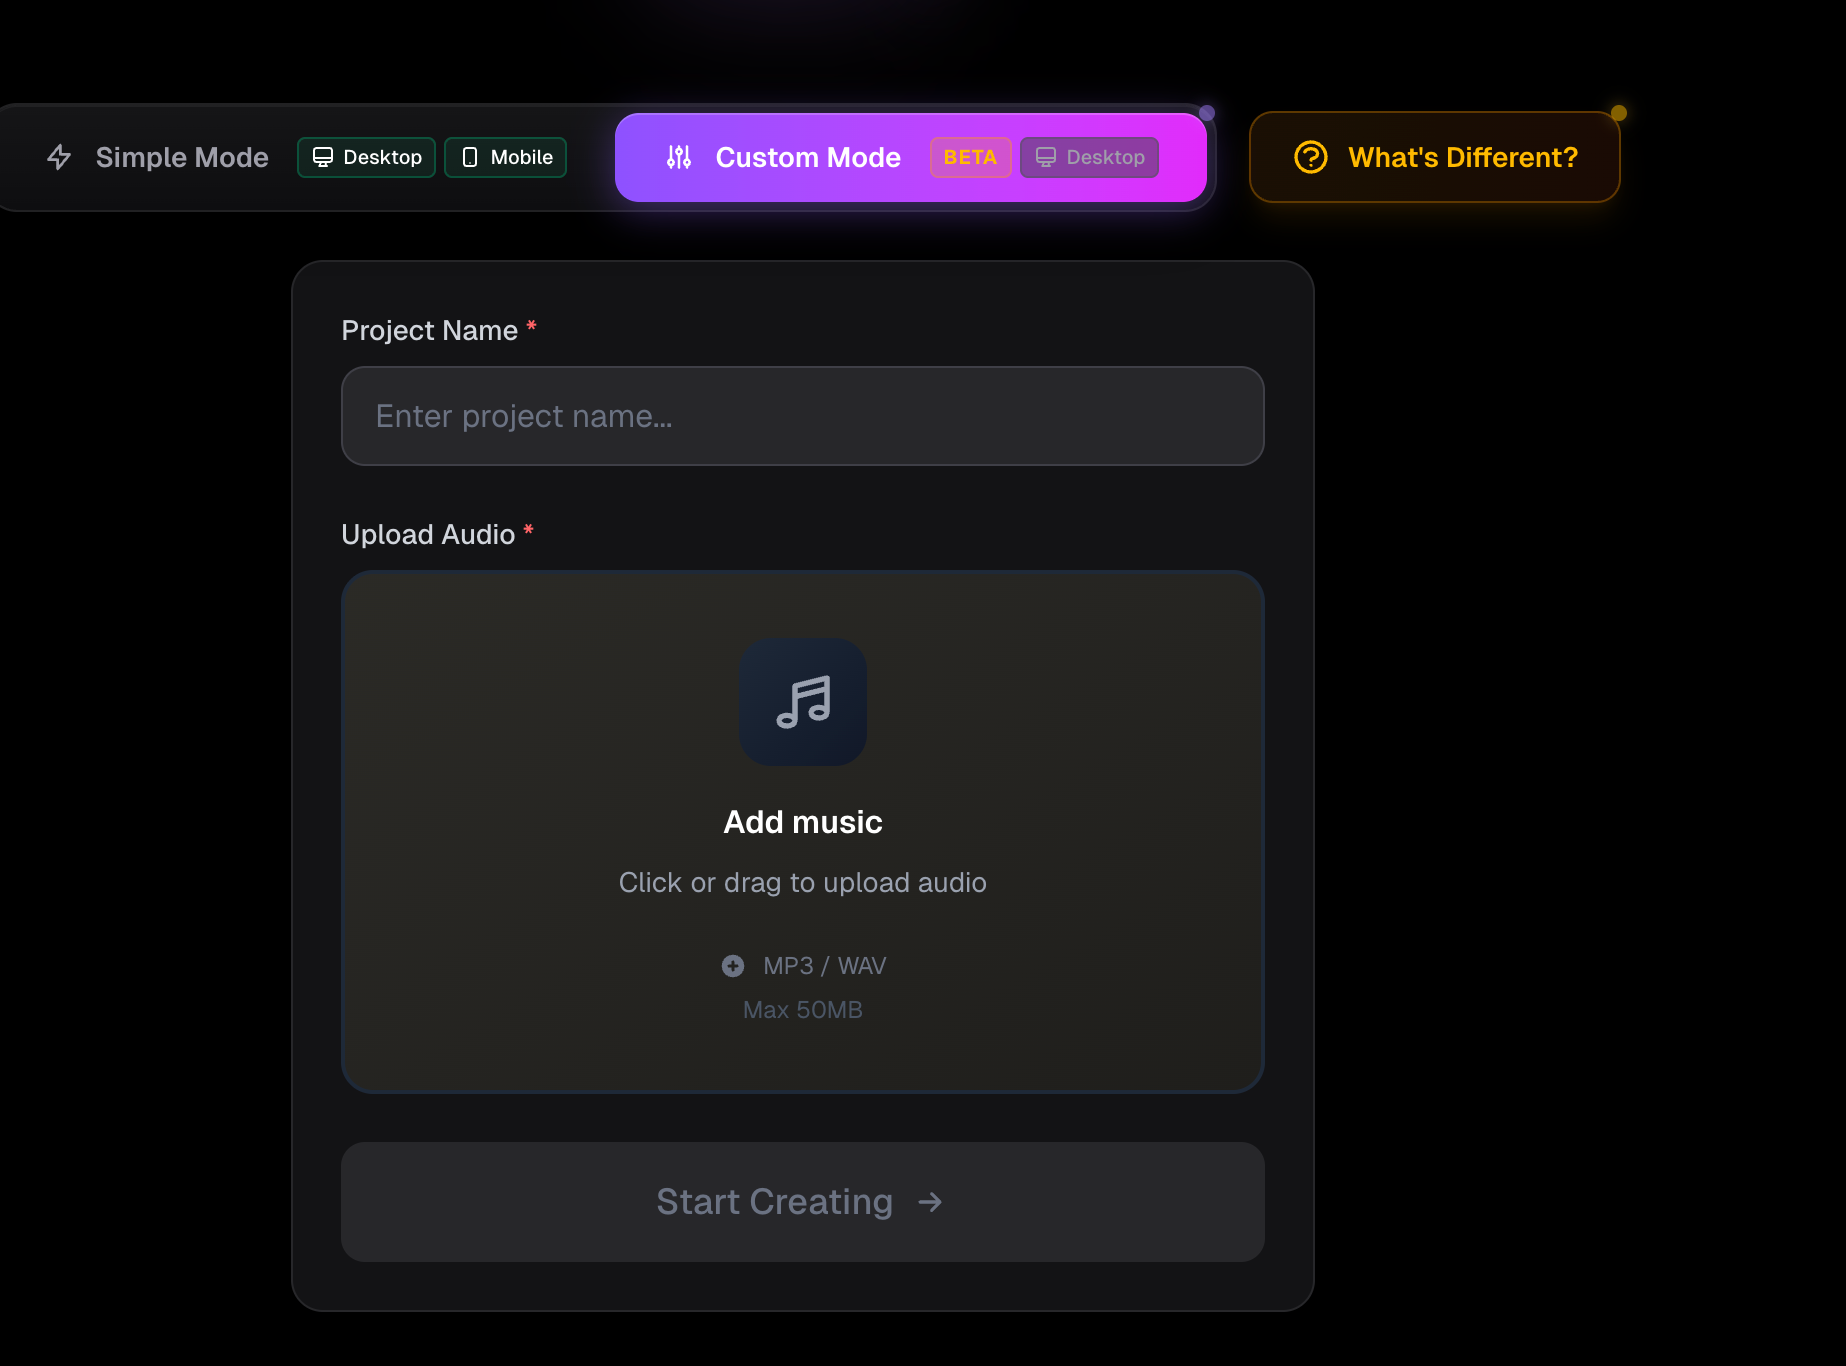
Creating a Task in Editor Mode
To create a Editor Mode project:
- Visit https://beatviz.ai/create-custom
- Upload your audio file
- Enter a project name
- Click Create Task
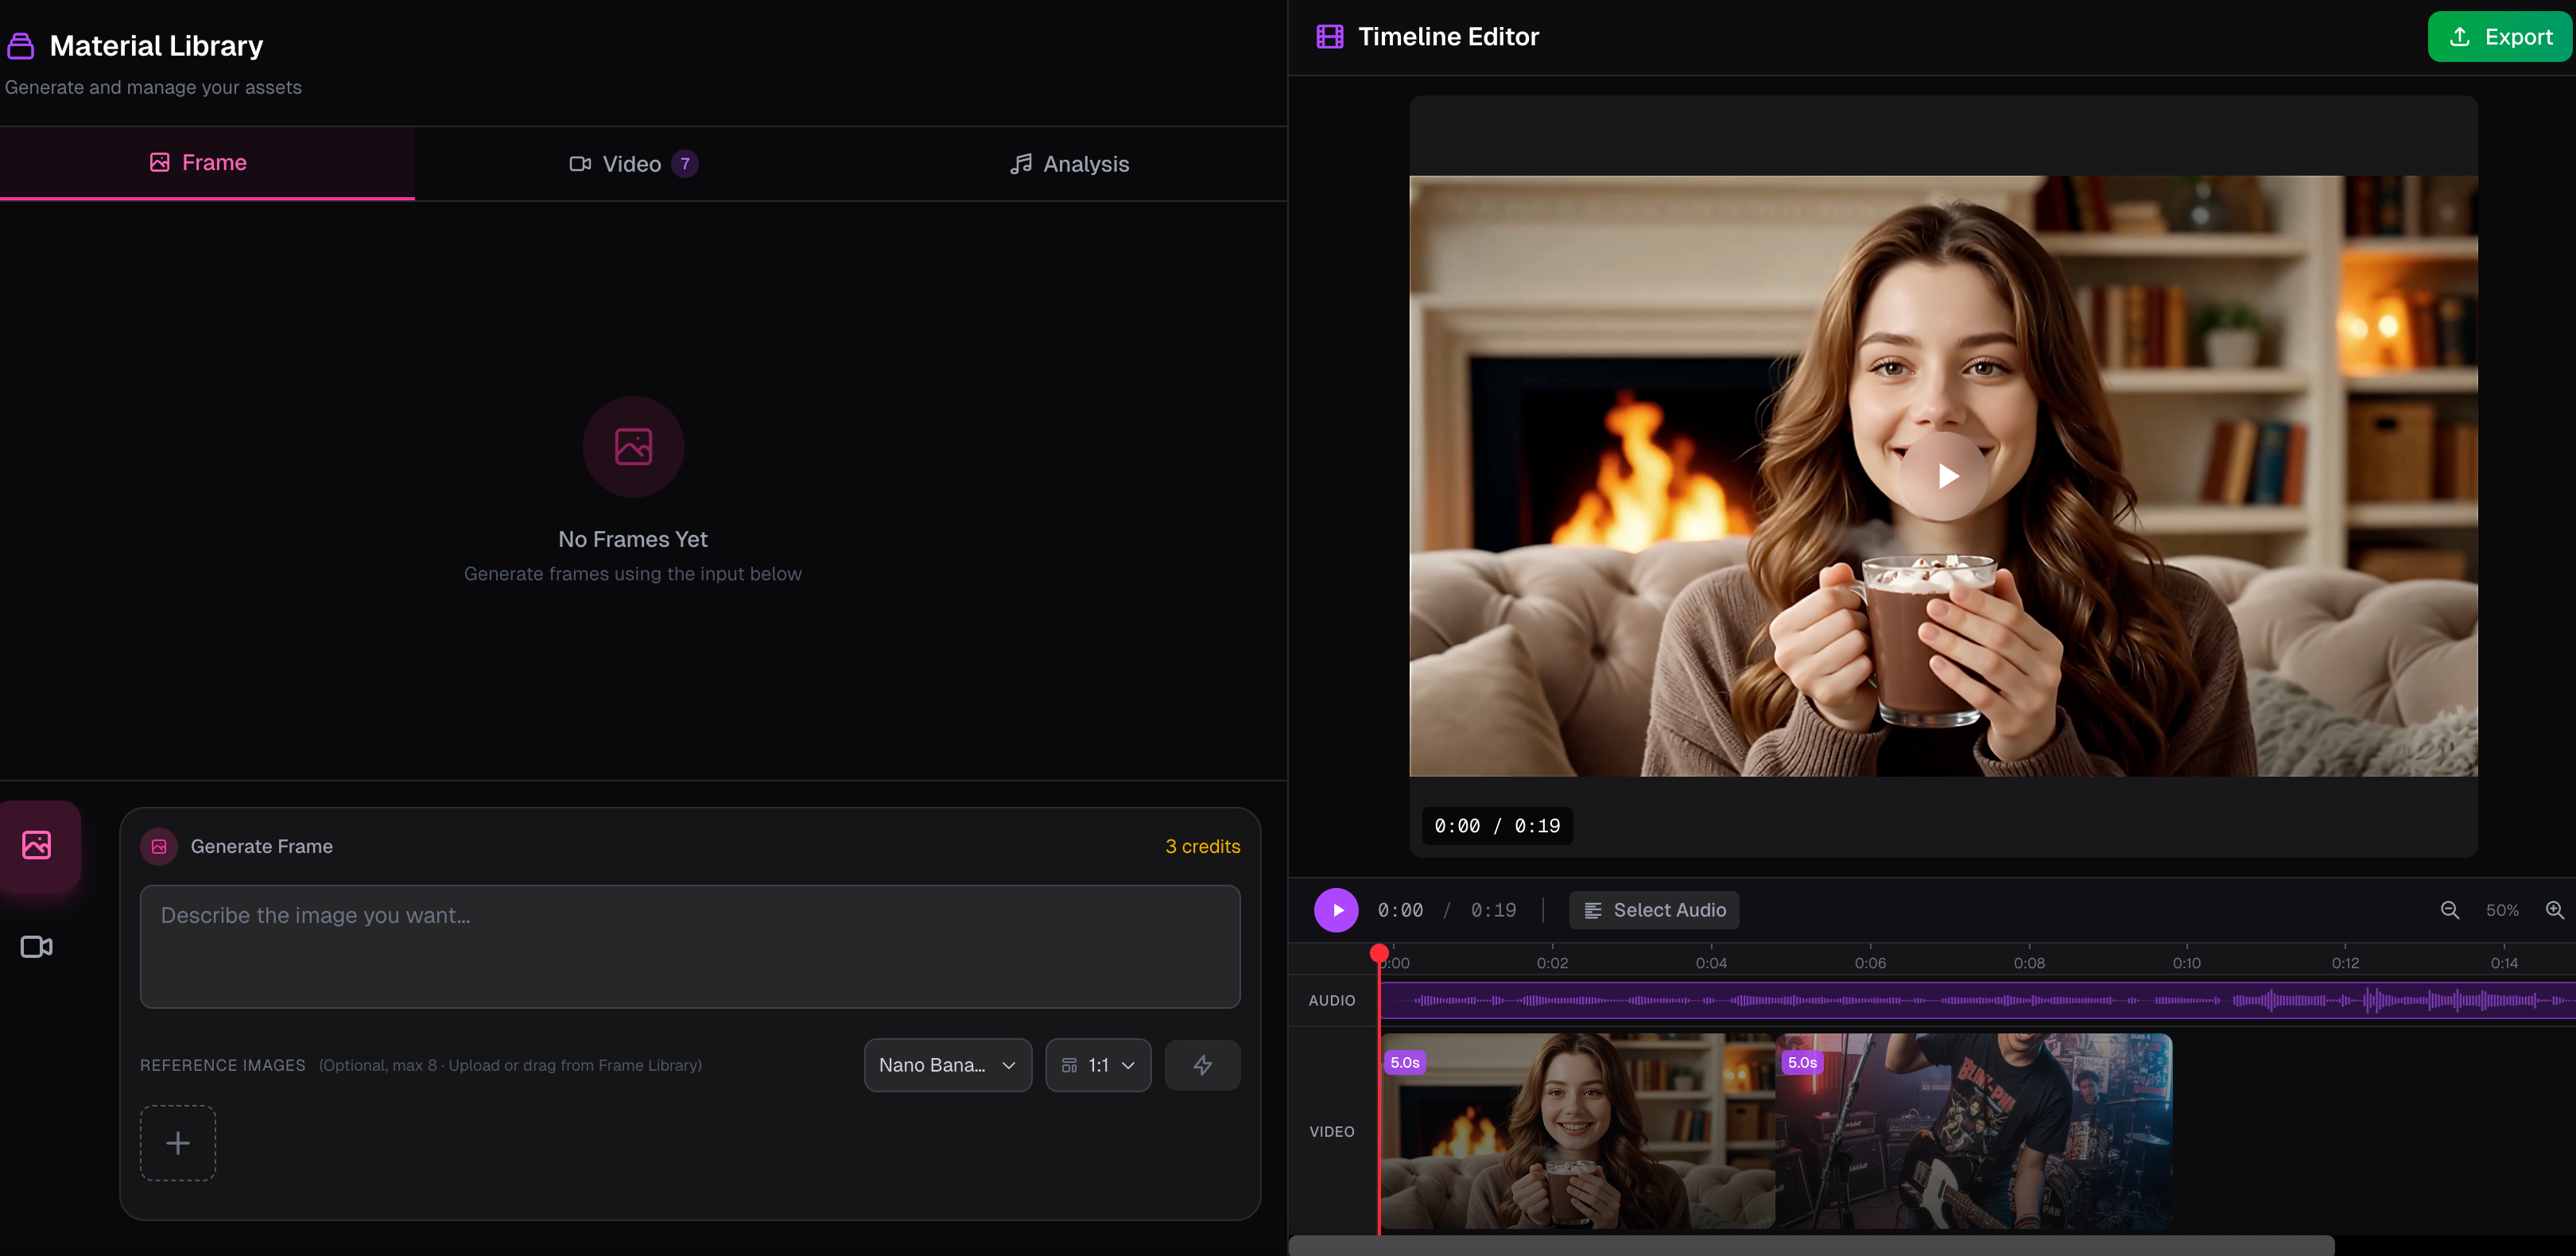
Editor Mode Interface Overview
The Editor Mode interface is divided into two main sections:
- Left Panel: Image and video generation workspace
- Right Panel: Audio timeline (track) workspace
The goal is to generate visual content on the left and align it precisely with your audio on the right.
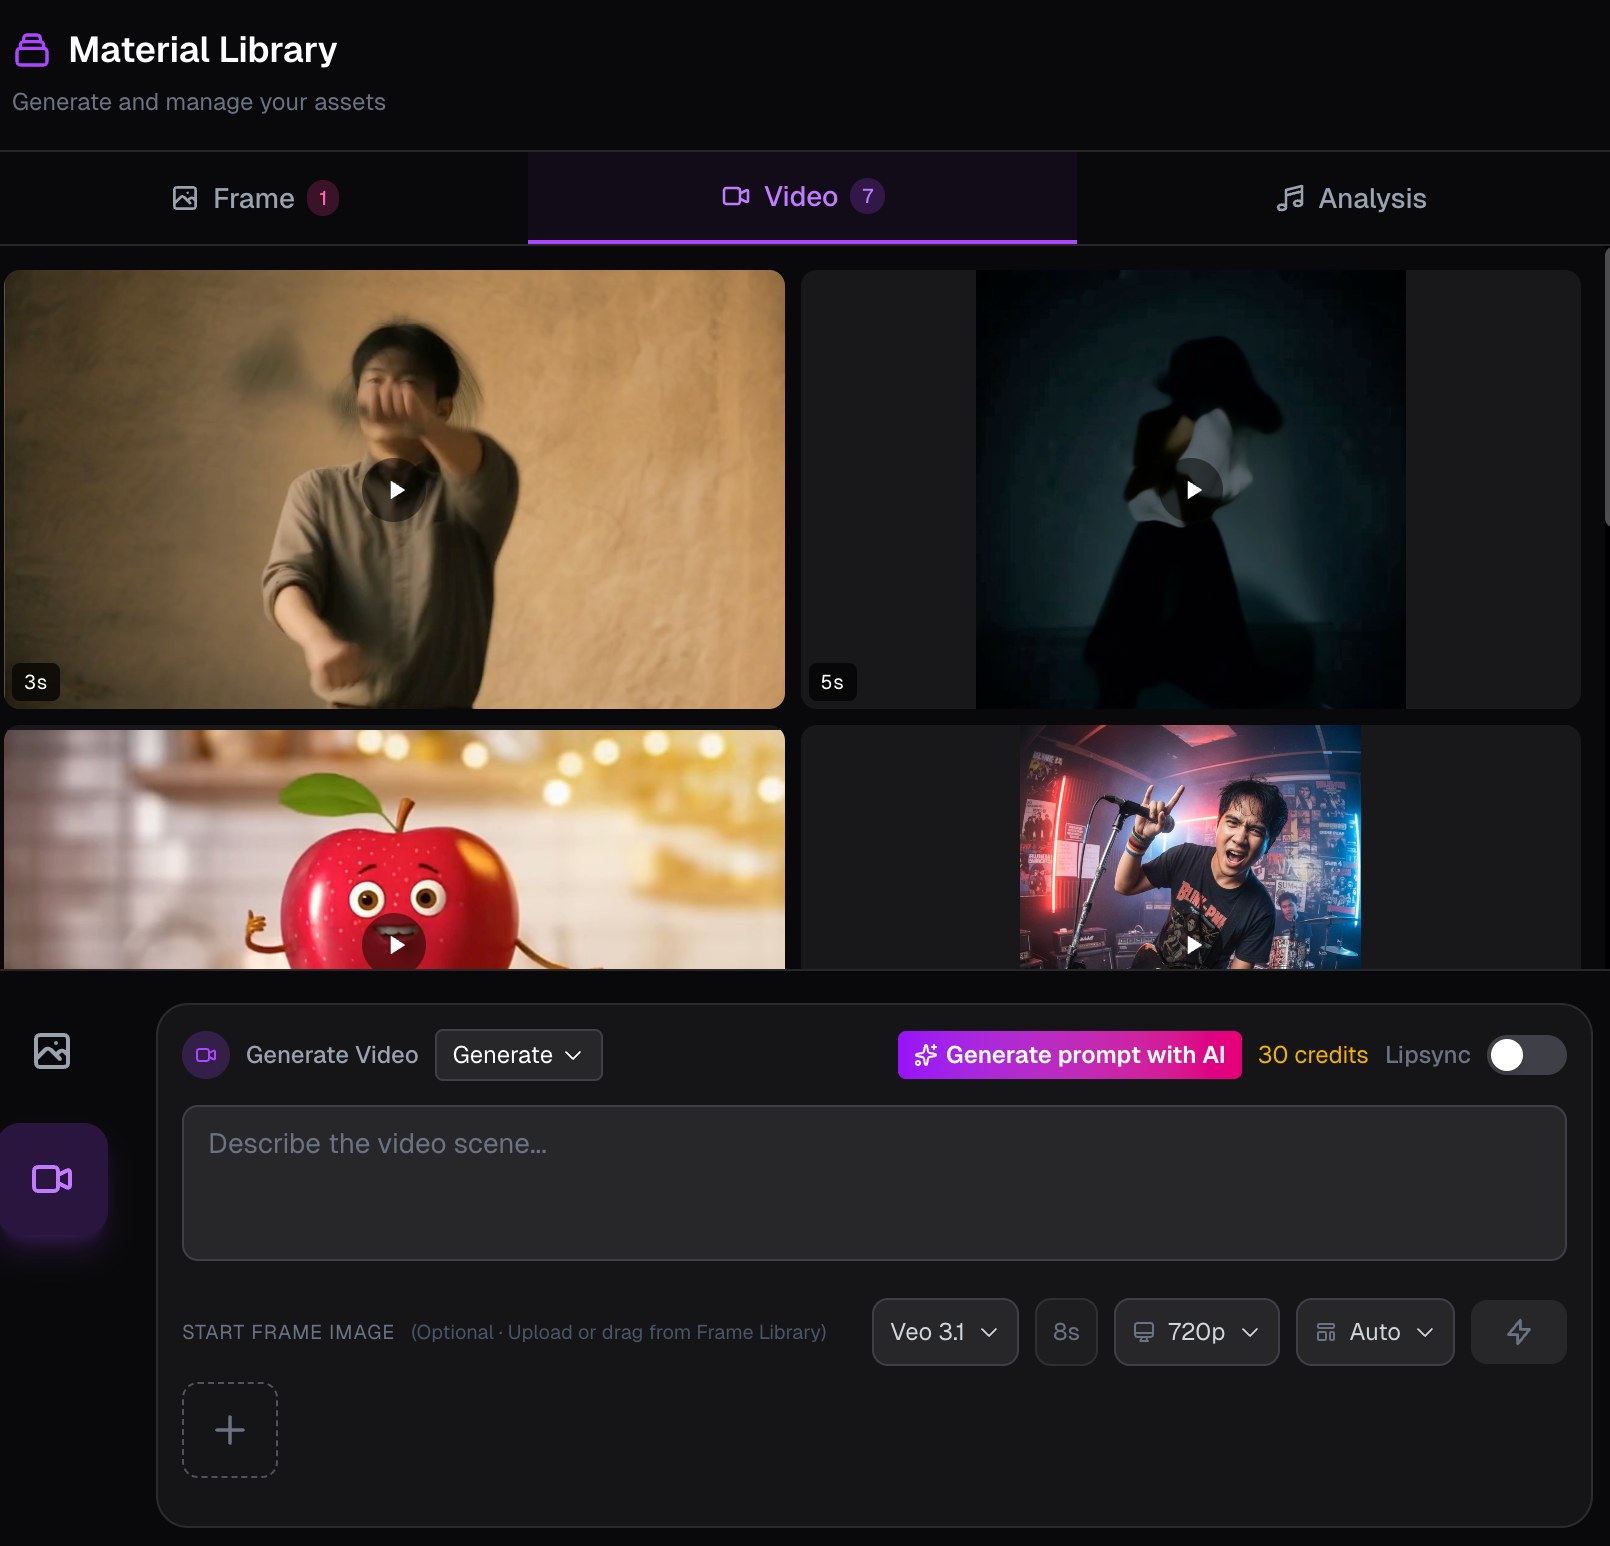
Left Panel: Generation Workspace
The left panel contains three core functional areas:
- First-Frame Image Generation
- Video Generation
- Audio Analysis (reference only, no auto-generation)
- The bottom section is the generator, where you input prompts and settings
- The top section displays generated images and videos
This panel is where all visual assets are created before being placed on the timeline.
Right Panel: Audio Timeline
The right panel is centered around the audio timeline at the bottom.
Here you can:
- Drag generated videos from the left panel onto the timeline
- Align video clips with specific segments of your audio
- Rearrange video order freely after placement
First-Frame Image Generation in Editor Mode
To generate a first-frame image:
- In the generator area, select Image
- Choose your preferred image model
- Enter your prompt
- Optionally upload a reference image
- Click Generate
First-frame images can later be reused to guide video generation.
Video Generation in Editor Mode
Video generation follows a similar workflow:
- Enter your video prompt
- Select a video model
- Optionally choose a first-frame image
- Generate the video
About First-Frame Images
A first-frame image defines the visual starting point of a video clip.
It strongly influences:
- Composition
- Character appearance
- Overall visual direction
Using a well-designed first frame can significantly improve video consistency and quality.
Applying Videos to the Audio Timeline
Once your video clips are generated:
- Drag them from the left panel into the timeline
- Align each clip with the desired audio segment
You can also:
- Change clip order at any time
- Replace or remove clips freely
Lip Sync Feature in Editor Mode
To use the lip sync feature, two steps are required:
Step 1: Select Lip Sync Audio
In the right-side audio timeline:
- Select the specific audio segment that requires lip synchronization
- Beatviz will use this selected audio to guide the AI's lip movement generation
Step 2: Define Visual Direction
You must also provide:
- A prompt describing the character and scene
- An optional reference image
These inputs define the overall visual style while the selected audio controls mouth movement.