Come usare il lip sync sui clip Workflow 2.0
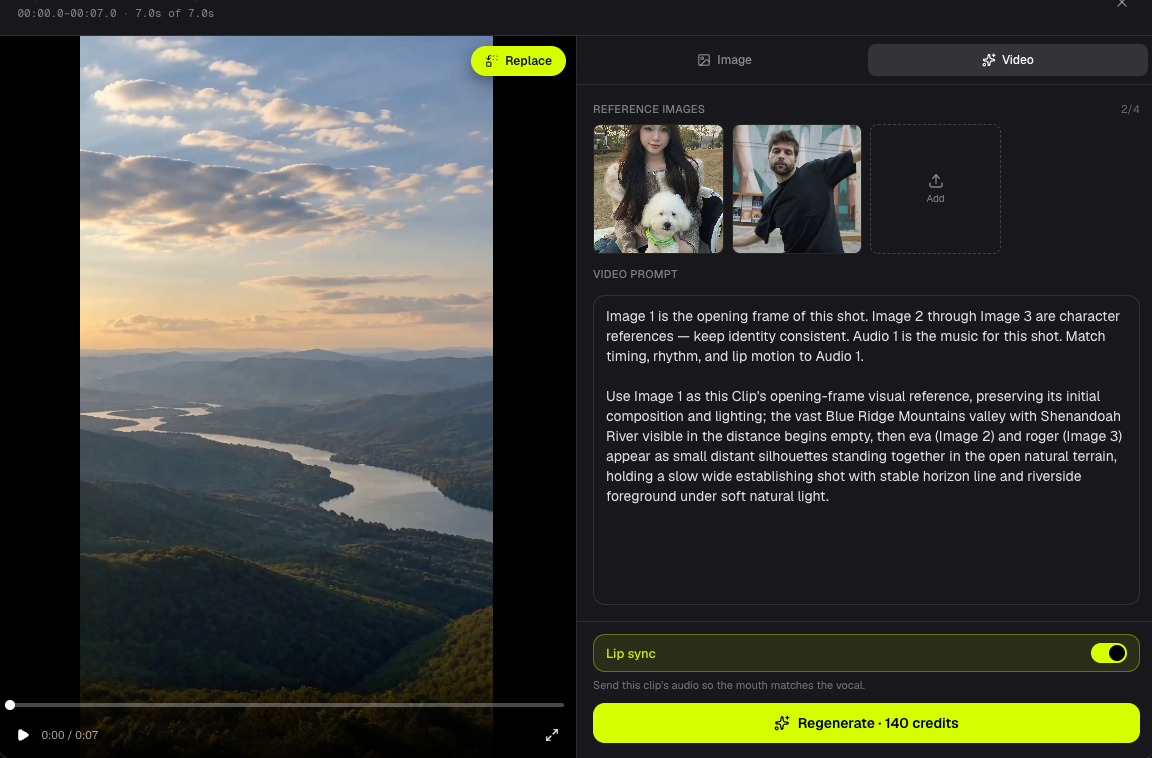
Workflow 2.0 lip sync is a per-clip switch at video generation. It is on by default. On: MiniMax receives that clip's song audio. Off: images and prompt only.
This is not Workflow 1.0 post-process Lip Sync and not Editor LipSync.
Accendere o spegnere il lip sync per clip
On Keyframe, every clip tile has a microphone in the top-right corner.
- Bright mic — lip sync on.
- Dim mic — lip sync off.
Click to toggle. The same switch is in the inspector above Generate Clip, and on the Video clip editor Video tab above Generate / Regenerate.
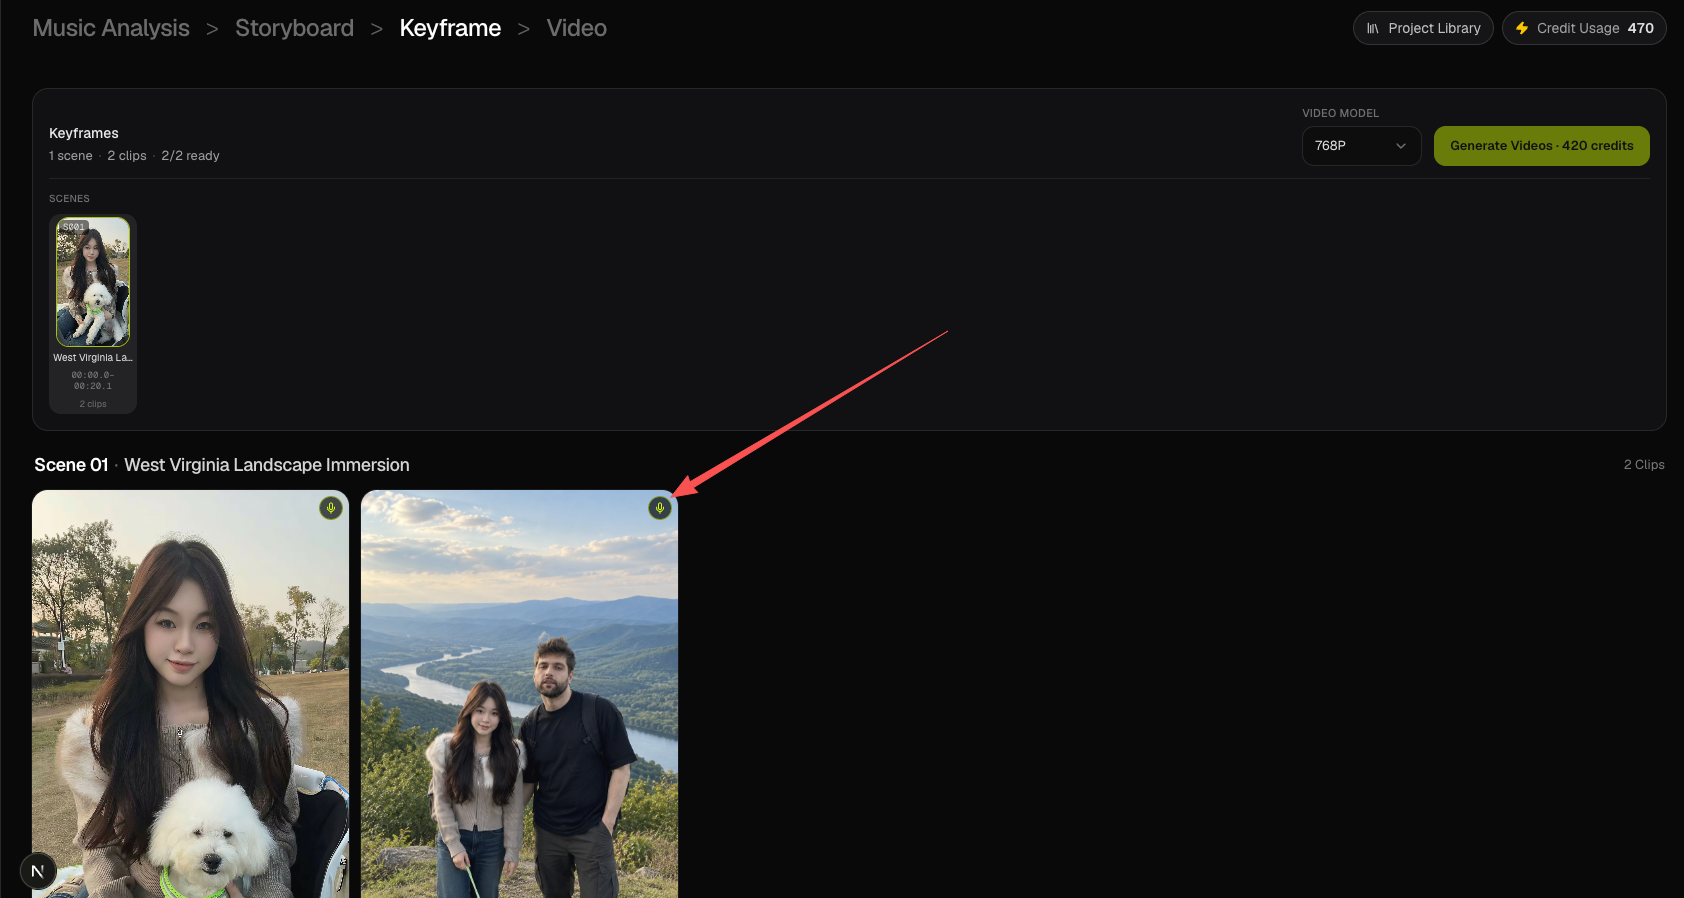
Cosa succede quando il lip sync è acceso
- Studio trims the task song to this clip window (Cloud Run).
- The MiniMax prompt includes the Audio 1 lip-sync block.
- Trimmed clip audio is sent as
reference_audio_urlsto Fal MiniMax H3 Max.
Cosa succede quando il lip sync è spento
- The Audio 1 / lip-sync prompt block is not added.
- Cloud Run does not trim clip audio.
- The Fal request has no
reference_audio_urls.
Video credits do not change.
Workflow 2.0 rispetto a Workflow 1.0 e Editor
| Path | How lip sync works |
|---|---|
| Workflow 2.0 | Per-clip switch at MiniMax generation. No extra credits. |
| Workflow 1.0 | Singing / scene-card Lip Sync after the base clip. |
| Editor | Timeline LipSync on a finished clip. |
Export still uses the original selected song. See Export.
Domande frequenti
Credits?
MiniMax is still billed on the integer clip duration at 768P or 1080P. The switch only controls clip audio.
After a clip is generated?
Toggle, then Generate / Regenerate that clip.
Same as Workflow 1.0 Singing?
No. Use Workflow 1.0 Singing or Editor LipSync for that path.
Avanti: ← Precedente: Genera clip video · Successivo: Rigenera un frame o un clip →
Guide correlate
Prova BeatViz Workflow 2.0
Carica un brano, scegli Studio Create · 2.0 e procedi con Music Analysis, Storyboard, Keyframe e clip MiniMax.